Bake To Textures
Export to Textures is an extremely simple and effective exporter.
Input: One or several exports, each with its own list of source objects and its own settings
Output: For each export, a single object with one UV layer and one material assigned, plus the baked textures saved on disk (named after the export)
Exports list
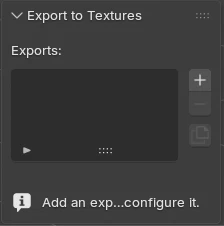
A scene can hold several exports at once. The list at the top of the panel manages them, and each item is a fully independent export setup: its own source objects, target, UVs, output path, texture size, PBR options and combined textures.
The name of the list item is the name of the export. It is used to name the generated object, the material and the texture files on disk — so give each export a distinct name to keep their outputs separate.
- ➕ Add — create a new export
- ➖ Remove — delete the active export
- ⧉ Duplicate — copy the active export with all its settings and its sub-lists (source objects and combined textures)
Selecting an item in the list shows and edits that export's setup below.
Tip
Duplicate is handy to derive a variant (e.g. a different target mesh or a different texture size) from an existing export without redoing the whole setup.
Export All
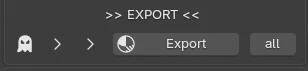
Next to the Export button, the small all button bakes every export in the list, one after another. Each export produces its own object and its own textures (named after the export), so they never overwrite each other.
Note
An export that is invalid (no source objects, or an invalid output path) is skipped, and the batch continues with the next one.
UI
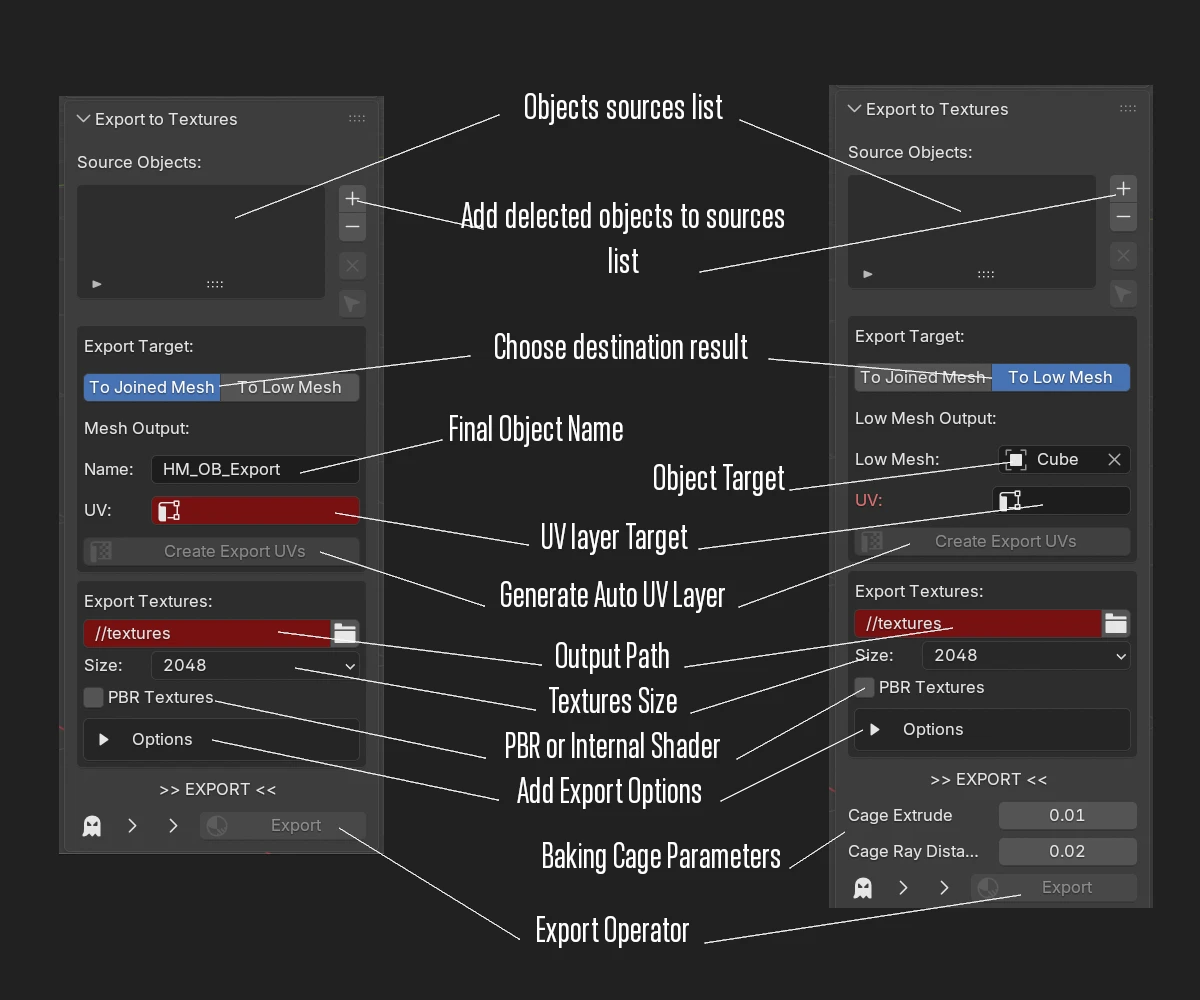
2 export Modes: Textures are baked on the joined Mesh of the source list or on a target mesh
options
Note
If the output path is not valide, the export operator is disabled
Overwrite
Re-running an export overwrites its own generated object and texture files (those matching that export's name). Exports with distinct names never overwrite each other.
Tip
In linked asset management, you must link the exported object. When there is a modification to be made on the asset, all it takes is a simple execution of the exporter because the options are saved in the scene (per export, in the exports list)
Tip
Do not use PBR Mode export if you want only optimize your internal render pipeline or if you don't need to export your datas
Parameters
Mesh output
- To Joined Mesh — the source objects are joined into one object. UV Export can be generated automatically (Auto UV on: a new
UVExportlayer is created, unwrapped and packed in the 0–1 square), or you pick an existing UV layer that every source object must have. - To Low Mesh — the detail of the sources is baked down onto a separate target mesh, with its own UV layer. Cage Extrude and Cage Ray Distance control the bake from high to low.
UV space
Only the 0–1 UV tile is exported. UDIM layouts are not supported: islands outside the 0–1 square are not baked.
Textures
- Path — output folder (the export is disabled while the path is invalid).
- Size — texture resolution, from 256 to 8192.
- RGB / RGBA — output file format for opaque maps and for maps with an alpha channel (PNG, OpenEXR, TIFF, Targa, WebP; JPEG for RGB only).
- Mono Data Maps — saves single-channel data maps (Metallic, Roughness / Smoothness, Specular, Transmission, Emit Strength) as one grey channel instead of RGB.
- PBR Textures — off: the material is rebuilt with Blender's own internal shader (Diffuse, Glossy, Roughness…), the right choice to optimize your renders. On: a metallic or specular PBR set for game engines, with the options below.
PBR options
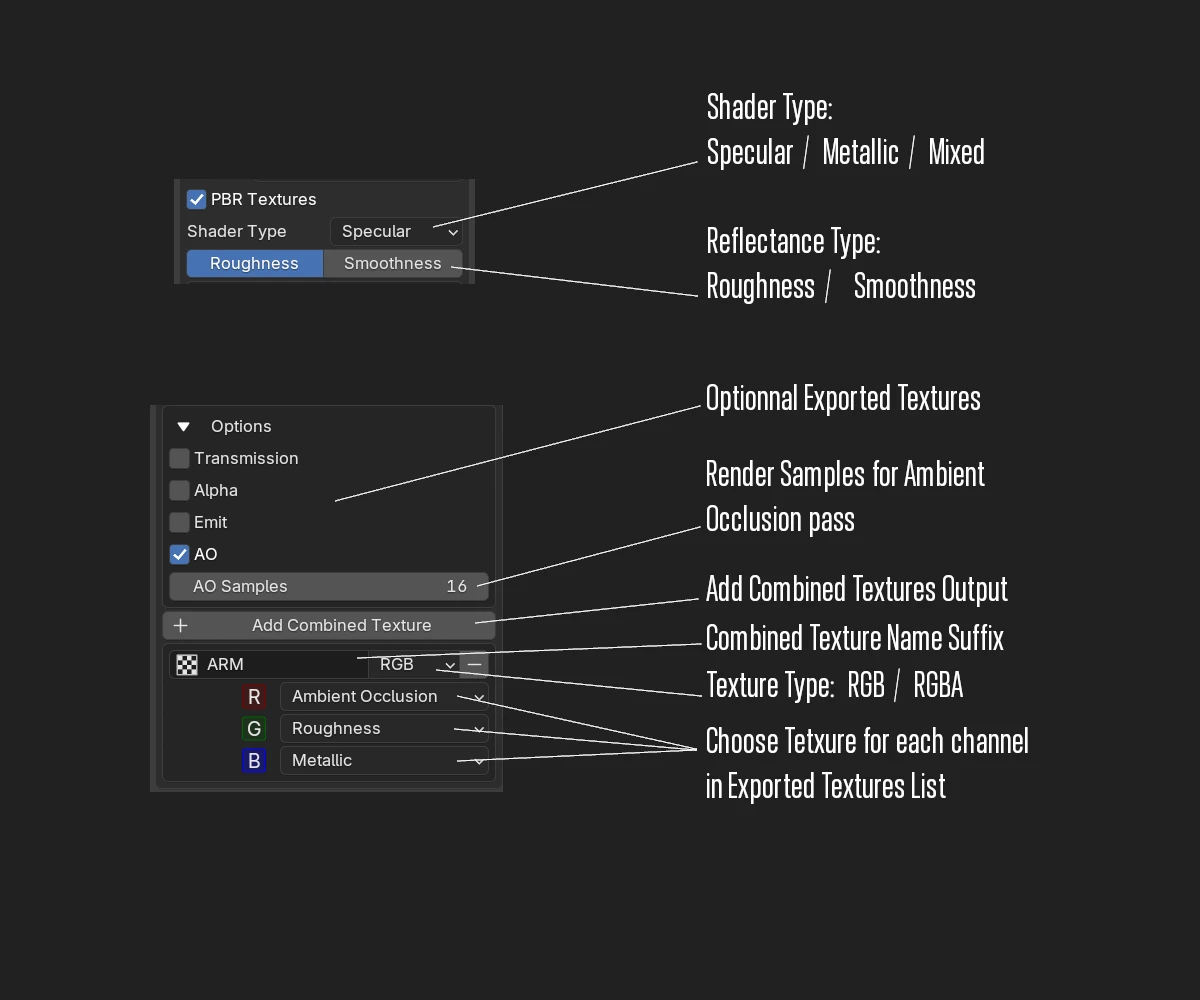
- Shader Type — Metallic, Specular or Mixed (both).
- Roughness / Smoothness — which of the two is exported.
- Transmission — bakes the transmission weight.
- Alpha — adds an alpha channel to the Color map; the export material reads its opacity from it.
- Emit Color — bakes the emission color (RGB).
- Emit Strength — bakes the emission intensity as a single-channel map (the brightest of R, G, B of the emission). If Emit Color is off, the Color map is used as emission color.
-
AO — bakes an ambient occlusion map. When enabled, two sub-options appear in a right column:
-
AO Samples — ray samples for the occlusion (higher = cleaner but slower)
-
Scene Occlusion — when enabled, the AO also takes the other visible objects of the scene into account (contact shadows cast by neighbouring objects); when disabled, only the exported object occludes itself. Objects in a hidden or excluded collection are ignored, even if they are renderable.
Combined textures
(PBR mode only.) Add Combined Texture packs several maps into the channels of one texture — the classic way to save texture slots in a game engine (for instance Metallic in R, Roughness in G, AO in B).
For each combined texture, set:
- a name (the file is named
<export>_<name>); - a type:
- RGB — three independent channels;
- RGB_A — four independent channels;
- Color_A — a Color map in RGB plus one channel in alpha;
- the source of each channel: Color, Roughness / Smoothness, Metallic, Specular, Transmission, Ambient Occlusion or Emit Strength (the list follows the options enabled in the export).
Up to 10 combined textures per export. A combined channel is a faithful copy of the single map it replaces — same values, byte for byte.
Keep Sources Textures
The Keep Sources Textures option appears just above the first combined texture (off by default).
- Off — the source textures that the export shader no longer needs are not kept on disk. A map whose channel is already in a combined texture is not exported separately.
- On — every source texture is kept on disk next to the combined ones.
Without any combined texture, every map is exported as usual.
Note
A source is only discarded once its combined texture has been successfully written. If a combination fails, the source is kept and the export material falls back on it. A warning is displayed in Blender's Info editor.
Export shader
In PBR mode, the export builds a Principled BSDF material on the exported object, with one Image Texture per map, stacked in a single column in the order they are created.
Combined textures have priority: when a combined texture carries a channel the shader needs (Metallic, Specular, Roughness / Smoothness, Transmission, Emit Strength, AO, or Color with a Color_A), the shader reads it from the combined texture — through a Separate Color node, or the alpha output — rather than from the single map. If several combined textures carry the same channel, the first one of the list wins.
- Base Color — the Color map. With AO, it is multiplied by the AO map (Multiply node, placed level with the Color texture). The emission keeps the unoccluded color.
- Metallic / Specular IOR Level / Roughness — Smoothness goes through an Invert node.
- Normal — through a Normal Map node.
- Emission Color / Strength, Transmission Weight and Alpha when the matching options are enabled.
- Data maps are imported as Non-Color.
Note
With Alpha enabled, the Color map stays a separate texture, because the opacity is read from its alpha channel.
Procedures
Export to combined mesh for Internal shader:

Export to combined mesh for PBR shader:

Export to low mesh for Internal shader:
